One Bowl Apple Crumble Pie and Dairy/Soy Free Pie Crust

IMG_6630

Thanksgiving isn’t complete without a dessert.  Although I often am nervous about bringing my dairy free creations to family gatherings, I know one family dinner guest list includes several people who avoid dairy so I will be bringing a dairy-soy free apple pie.

I made this apple pie a few weeks back for my husband and kids after we went to the apple orchard.  It was a big hit.  Although I prefer to share recipes that don’t need expensive substitutes/butter replacers, this recipe definitely needs one for the crumble topping.  The good news is you can make a very decent pie crust with things you probably have around the house.

In the past I’ve made pie crusts by substituting the butter in recipes with Spectrum shortening or Earth Balance Soy Free Spread.  These came out fine but I have another crust recipe that bypasses the expensive ingredients, chilling time in the fridge and extra mess.   I make an oil based crust that you don’t have to roll out, but it will still hold a shaped edge for pretty pies.  I use canola oil for sweet pies and a light olive oil for savory applications like a quiche crust.  I make my crust with half whole-wheat pastry flour for the nutritional benefits and the nutty taste, but all-purpose flour will probably be fine if you don’t have that.  I want to note that I cannot find the original source for this recipe to give credit where it is due. I jotted an oil crust recipe down next to a pie filling recipe some time ago and tinkered with it a bit.  Like many things, I get inspiration somewhere and often adapt it to fit allergy needs and my family’s taste buds.  So thanks to whoever originally came up with this idea!

The apple pie recipe comes from a recipe I found on allrecipes.com. I tweaked both the ingredients and construction a bit to fit my diet and make it a one bowl deal.  That is one bowl, including the making of the pie crust.  Yay! (I’m always looking for a way to use less dishes.)  To make the apple filling for the pie I like to use an apple-corer-peeler-slicer to speed up the process but you can definitely do it by hand if you have to or wish to have chunkier apple pieces.  Just make sure you adjust your baking time to compensate for the larger pieces of apple.    To test for doneness I often sneak a piece of apple out of the pie edge and see if it is cooked through.  If you see thickly bubbling juices, that is another good sign.   If the top of the pie is getting too brown and the apples need more time to cook, just throw a piece of foil over the top of the pie while it continues to cook.  Be sure to cool your pie completely before slicing.

Here is the pie crust recipe by itself if you just want to use the crust, but see the apple pie recipe below for how to make the pie crust and pie using just one bowl.

Easy Dairy and Soy Free Pie Crust

2/3 cup canola oil (or other neutral tasting oil)

2 teaspoon sugar

1 teaspoon salt

6 tablespoons water

1/8 teaspoon butter flavor (very optional)

1 cup all-purpose flour

1 cup whole wheat pastry flour (or all-purpose flour)

Directions

Mix the oil, sugar, salt, water and butter flavoring, if using, together in a large bowl.  Add in the flours and stir until combined. Press dough directly into pan.

One Bowl Apple Crumble Pie

Ingredients for easy pie crust (see above)

5 cups apples peeled cored and thinly sliced

1/4 cup white sugar

1/4 cup brown sugar

3/4 teaspoon ground cinnamon

2 teaspoons arrowroot starch  (or cornstarch)

Topping Ingredients:

1/3 cup white sugar

3/4 cup all purpose flour

6 tablespoons butter replacer like Earth Balance Soy Free Spread

Directions

In a large bowl combine the ingredients for the Easy Pie Crust.  Press the dough into a pie pan.  Preheat oven to 400 degrees F.  In the same bowl used for the crust (don’t bother washing it), mix apples, 1/4 cup white sugar, 1/4 cup brown sugar, cinnamon and arrowroot starch.  When the apples are evenly coated, spread the apples evenly in the unbaked pie crust.  Now prepare the topping in the bowl (no, don’t clean it yet.)   Mix the 1/3 cup sugar with the 3/4 cup flour.  Add the butter replacer and stir/mash it with a fork until the mixture is crumbly. Top the pie with the mixture- I use a measuring cup to scoop it up and distribute over the apples.   Bake pie for 35 -40 minutes or until the apples are soft.  (I often sneak an apple piece out, cool it slightly and eat it to see if the apples are soft).  Baking time will vary depending on how thinly the apples were sliced.  Cool completely before cutting!

Please forgive the mediocre picture. WordPress mangled/lost this  post twice. Running short on time to get this up before turkey day.

Cherrybrook Kitchen-First Birthday Cake

As I mentioned in my last my last post, I found a soy, peanut, dairy, egg, and nut free cake mix at Whole Foods.  It is made by Cherrybrook Kitchen and it is my new favorite allergy friendly cake mix.

The first thing I loved about this cake mix was the ingredient list.  It is simple and contains real foods.  I checked the company’s website and although it doesn not say it on the box, the mix is also soy free.

It does contain wheat, which fortunately is a safe food for Colin. For those of you looking for gluten-free, their website shows several gluten-free mixes as well but I have not tried them.

I also love that the cake was easy to make.  You dump the mix, water and oil or melted margarine in and mix.  Do notice that the ingredient list shows “melted margarine” with a star next to it.  The footnote says that you can substitute oil or butter according to your needs.  I used canola oil and it was great.

This cake mix wasn’t cheap but it was a huge time saver since I didn’t have a lot of time to create an egg and dairy free cake for Colin’s first birthday.  A week ago I decided to give this box mix a trial run and I was very surprised at the results.  It tastes good! It does not taste like cornbread like every other allergy friendly or organic box mix.  I wouldn’t go as far to say it tastes like yellow cake, it’s more like a light banana muffin.  No, it doesn’t have any banana flavor, but the sweetness, brown sugar and muffiny texture remind me of the banana muffins I make.  It is really tasty, just don’t expect it to taste like the typical grocery store birthday cake and I don’t think you’ll be disappointed.  In the picture below you can see the uneven air bubbles that more closely resemble a muffin texture than a store made yellow cake.  You can also see that the cake is a light brown, not yellow, which was fine with me.  The cake was very moist and liked by all the cake eaters in my house, including Colin.

Looking for a simple frosting, I tried to make frosting out of solidified coconut oil (not my usual coconut milk or spread) and powdered sugar.  The resulting “frosting” was strongly coconut flavored and a bit grainy.  Not wanting to waste it and trying to make the best of my experiment, I topped it with flaked coconut.  I’m not sure I would ever serve it to strangers but I sure didn’t mind it.   I wanted something a little less sugary for Colin’s cake and decided to go with the coconut whipped cream I’d made in the past and use just a wee bit of sugar for sweetness.

Now for those of you who have kids with allergies, you may be thinking, “Did you trial all of these things?”  Well….sort of.   Colin had previously had most of the ingredients in the cake mix except for baking powder and vanilla flavor.   We gave him a small piece the night I made the cake to make sure he didnt’ have any major reactions.  He slept great (for him) and so a few days later I gave him some coconut, the solidified stuff from the top of the coconut milk can.  Again, no issues.  He’s had corn so I figured the cornstarch in the powdered sugar would be fine.  The cake and coconut didn’t get full-on trials, mostly just brief exposures to make sure he wouldn’t have some terrible reaction on his birthday.  I wouldn’t say coconut milk is a safe food for his diet just yet, but for the sake of his birthday, I thought it was fine.

I baked a tiny little cake and right before serving, whipped up some coconut whipped cream.  I piped it on the cake and voila!  Colin had a GREAT time smearing the whipped cream around.  He mashed the cake up a good bit and put his face into it several times to take bites.  He enjoyed himself, we got lots of great messy photos and his tummy was happy that night!  A very successful first birthday cake! Thank you Cherrybrook Kitchen!

Coconut Whipped Cream

Recently I started using coconut milk as a milk replacer in some of my cooking and baking.  I buy the real stuff in cans, not the cartons you can now find in the dairy aisle as those unfortunately all have carrageenan in them.  Finding the cans can be tricky at times but usually I can find them in the international section of a grocery store.  Although I primarily use light coconut milk, sometimes I buy the regular full fat version when I want to make ice cream or whipped cream!

Yes – dairy free whipped cream! Could it be true?  I’ve seen recipes floating around the internet for coconut whipped cream and after months of dairy deprivation it sounded so yummy.  I gave it a go and was very surprised.  The texture was much better than I expected, just like whipped cream and it is delicious.  It definitely tastes like coconut but as I added more powdered sugar, I thought it tasted closer to real whipped cream.   I made a half batch to try it out and ended up eating all of it spooned over raspberries.  I made a dessert with angel food cake, strawberries and this whipped cream two days later just so I could eat more.  It’s a super easy recipe and definitely a great addition to the Milk and Soy Free dessert list.

Coconut Whipped Cream

Ingredients

1 can of coconut milk- (light coconut milk will not work for this)

2-3 tablespoons powdered sugar (or to taste)

1/8 teaspoon vanilla extract (optional)

Directions

Place the can of coconut milk in the fridge for several hours or overnight until well chilled.

Remove the top of the can and scoop out all of the solids that have accumulated at the top and place them in a mixing bowl.   Save the liquids for other baking uses.

Use a hand mixer or stand mixer and whip the coconut solids on high for three minutes, scraping down the sides a few times.  Add the powdered sugar and vanilla, if using, and beat for another minute.

You can see here that does get to a great whipped texture like homemade whipped cream.


Use/eat the whipped cream immediately.  You can store it in the refrigerator for several days but it will lose some of its volume.

It is great on lots of desserts but I also enjoy putting it on hot coffee and sprinkling with cinnamon.  Turns my morning decaf coffee into something special.

Snickerdoodles From My Sister

I have amazing family.  Immediate, extended and the one I married into are all full of supportive wonderful people.  I have needed a lot of ears for listening, a shoulder or two to cry on, and some patient hands in the kitchen to help me in the last 7 months.   I know I am not an easy house guest to have over anymore.  I always try to bring as much food as I can with me, but family members have still gone out of their way to make food I can eat.  It is a very difficult task, especially because our list of safe foods keeps getting smaller, and I appreciate it more than they will ever know.   Sometimes I see food as a struggle and a chore, often when I am out of food ideas or just tired of making almost every single thing I eat.  Having someone else take that out of my hands, even just for one meal or snack is a such a treat.  The recipe I am sharing today is from one of those occasions.

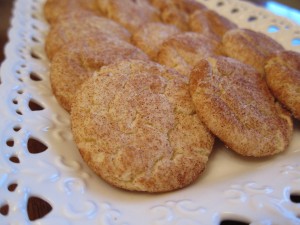
Around Christmastime I had been busy making butter filled cookies and candies for the cookie trays I give away.  I hadn’t really taken the time to make myself any safe treats and by the time our family Christmas eve party came, I was really wishing I had made myself something.  My older sister, who makes amazing snickerdoodles, showed up with a box of snickerdoodles she had made that were dairy and soy free.   She had replaced the butter in her recipe with Earth Balance Coconut spread.  It was such a great present.  I know she went to a lot of work to find the coconut spread and make the cookies (she has two kids to look after as well).  The cookies were sweet, soft and didn’t taste like coconut at all to me.  Just yummy snickerdoodleness.  I dove into those cookies headfirst.  I think I had four or five cookies that night and continued to eat most of the batch over the next two days.  I think my sister noticed I was eating them like a starving madwoman or she is just extra awesome because she keeps making them for me almost every time I see her.

My sister gave me her recipe for snickerdoodles and I’ve tried it a few times, trying to replicate her cookies which are always so soft, they way I love them.   I think the trick to them is to underbake them.  When I cooked them until they looked totally set they were good but too crispy after a day or two for my liking.  The cinnamon-sugar rolling mixture in the recipe includes two types of cinnamon.  She has found that her favorite, the Vietnamese cinnamon, is a bit too strong if you use two teaspoons so she uses another cinnamon blend from Penzeys to balance it out.  If you don’t have these spices, just make sure to use two teaspoons of good cinnamon, not an old jar that has been in your pantry too long.  Lastly, if you can’t get your hands on the Earth Balance coconut spread, look for their Dairy and Soy Free spread.  I’ve used that and had good results.   I’ve not tried using just Spectrum shortening for the fat but that might be a workable option if you can’t find Earth Balance.

My Sister’s Snickerdoodles

Ingredients

1 cup of butter alternative like Earth Balance Coconut Spread

1 1/2 cups white sugar

2 eggs

2 teaspoons vanilla extract

2 3/4 cups all-purpose flour

2 teaspoons cream of tartar

1 teaspoon baking soda

1/4 teaspoon salt

Rolling Mixture:
2 tablespoons white sugar

1 teaspoon Penzeys cinnamon blend

1 teaspoon Penzeys Vietnamese cinnamon

Directions
Preheat oven to 400 degrees.  In a large bowl, cream together the butter and 1.5 cups of sugar.  Add the eggs one at a time, mixing between each and then add the vanilla.  In a separate bowl, mix the flour, cream of tartar, baking soda, and salt. Add the flour mixture to the butter/egg/sugar mixture and mix. In a small bowl, mix the 2 tablespoons of white sugar and the 2 teaspoons of cinnamon. Form dough into small balls (mine are each about 1 tablespoon of dough) and roll them one or two at a time in the cinnamon sugar mixture.

Place dough balls on an ungreased cookie sheet and bake at 400 degrees for 5-9 minutes, depending on your oven and how soft you like them.  I cook mine for 5 1/2 minutes.   They will crisp up as they cool and go great with a cup of coffee!